Mandelbrot Set – Rust Edition

It’s been a long while since I wrote a blog post. For one thing, “normal” work got in the way. As for community contributions – it has been redirected lately to Youtube videos. Usually it takes less time to record a video than it is to write a post. But posts allow for more details and nuances…

One of my pet peeves is the Mandelbrot Set – it keeps fascinating me, which led me to write a Mandelbrot viewer of sorts for some technologies/languages I am familiar with (C++, C++ AMP, C#/WPF, C#/UWP, …). I recently realized I failed to do so with Rust, my favorite language these days. This post will attempt to right that wrong.

This post assumes the reader has a basic understanding of Rust, although I’ll try to explain anything that looks complicated.

Creating a New Project

Creating a new project for the Mandelbrot Set is no different than any other Rust project:

cargo new mandelbrot

Then we go into the newly created mandelbrot directory and start some IDE from there. The most common (probably) IDE Rust devs use is Visual Studio Code with the rust-analyzer extension that does much of the heavy lifting. This works well enough, but recently I decided to switch to JetBrains RustRover, which is dedicated to Rust, and is not generic like VSCode. RustRover is free for personal use, and I prefer it over VSCode, but YMMV.

Open the directory with VSCode, RustRover, or any other IDE/editor you prefer.

Building the Mandelbrot Set

Building the Mandelbrot Set itself has little to with how its represented, so we can start with that. We need support for complex numbers, so we’ll add the num-complex crate to cargo.toml:

[dependencies]
num-complex = "0.4.6"

We’re going to work with f64 types for the complex numbers, so we can define a simpler type going forward (in main.rs):

type Complex = num_complex::Complex<f64>;

We’ll write a function that has a loop for a given iterations, and a point to check whether it belongs to the set or not, and it will return a loop index as soon as the point is determined not to be part of the set. If after all iterations, it seems it is part of the set, then the number of iterations is returned (which is the highest). This could look like this:

fn mandelbrot_color(c: &Complex, upper: u32) -> u32 {
    let mut z = Complex::ZERO;
    for i in 0..=upper {
        z = z * z + c;
        if z.norm_sqr() > 4.0 {
            return i
        }
    }
    upper
}

(Unfortunately, this WordPress client has no syntax highlighting support for Rust, so I chose C++ as the next best thing. Shame!)

The function is somewhat misnamed, as it’s not returning any color – it’s returning an index, which can be used to represent a color, as we shall see.

The function takes a Complex number and an upper limit for iterations. The Mandelbrot sequence is calculated (z multiplied by itself, added to c, becoming the new z). If its magnitude squared is greater than 4, it’s diverging, so it’s not part of the set. Its “speed” of divergence is indicated by the returned value.

At some point, we must decide how to represent the pixels we’ll eventually display. One obvious choice is a matrix of pixels, each 32-bit in size, comprising of a Red, Green, Blue, and Alpha components, each with a value between 0 and 255. Let’s go with that.

mandelbrot_color works on a single point, so we need to iterate over a matrix of pixels, and the range in the complex plane where the points to calculate reside. The function named mandelbrot is responsible for that. It takes the aforementioned parameters and in addition it takes the matrix data to modify:

fn mandelbrot(data: &mut [[u8; 4]], from: &Complex, to: &Complex, width: u32, height: u32) {
    for y in 0..height {
        for x in 0..width {
            let c = Complex::new(
                from.re + (to.re - from.re) * x as f64 / width as f64,
                from.im + (to.im - from.im) * y as f64 / height as f64,
            );
            let iter = mandelbrot_color(&c, 255);
            let index = (y * width + x) as usize;
            data[index] = [ 255 - iter as u8, 255 - iter as u8, 255 - iter as u8, 255];
        }
    }
}

The first parameter type looks complex (no pun intended), but it’s a mutable reference to a slice to an array of 4-bytes. Of course, we must ensure that the number of elements in the slice is correct, otherwise the program will panic if we go beyond the slice size. The other parameters consist of the “top left” and “bottom right” corners of the complex plane to go over, and the width and height representing the number of pixels we have to work with.

Next, we start a 2D loop that goes over all pixels. For each one, it calculates the value of c by linearly interpolating in the x and y dimensions (or real and imaginary if you prefer). Then the call is made to mandelbrot_color with the value of the point calculated (c) and an upper limit of 255. This is makes it easy to use the return value directly as a color component. In this first attempt, the code just set the value directly to the RGB components, making it a shade of gray. The alpha component is set to 255, so the color is opaque. The pixel index is calculated (index) and the 4-byte array is assigned. Notice how elegant it is – no need for C-style memcpy or something like that. The actual color values are inverted, so that if the point belongs to the set it’s black, and if it “runs away” quickly, it gravitates towards white. Of course, the reverse would also work, but the “classic” selection is to have points in the set in black.

Drawing the Set

It’s time to show something on the screen. How would we plot all the pixels with their (grayscale for now) colors? I could do something Windows-specific, maybe some interop with the Windows GDI and such. This is certainly possible, but why not take advantage of the cross-platform nature of Rust. There are many crates that can do graphics that are cross-platform, supporting at least Windows, Linux and MacOS.

There are many options here, but I decided to go with a (relatively) simple one, a crate called macroquad (which is open source of course). This library can be used to create games, but in this program we’ll use some of the basics needed to display a bitmap. Here is the updated dependencies in cargo.toml:

[dependencies]
macroquad = "0.4.14"
num-complex = "0.4.6"

We’ll add a couple of use statements to make coding less verbose:

use macroquad::prelude::*;
use macroquad::miniquad::window;

Here is the general layout of the main function when using macroquad:

#[macroquad::main("Mandelbrot")]
async fn main() {
   // init
    loop {
        // draw, handle input, ...
        next_frame().await
    }
}

This is certainly an unusual main, even by Rust standards. The main function is async, which normally isn’t allowed (because any call to await needs to return to some runtime, but there is no “returning” from main to anywhere but the OS). To make this compile (and work), macroquad provides a macro (macroquad::main) that provides the “magic”. Going into that in detail is beyond the scope of this post. Rust developers that are familiar with the tokio crate that provides a generic runtime for async/await have seen this pattern – tokio has its own “magical” macro that allows main to be async.

The point of all this is to allow calling next_frame().await that essentially waits for the vertical retrace of the monitor, keeping a steady frequency based on the monitor’s current frequency. That’s all we need to know – this loop runs 60 times per second or whatever the monitor’s frequency happens to be. Our job is to do the drawing and any other logic before “presenting” the next frame. Those familiar with concepts like double-buffering, graphic pipeline, etc. – it’s all there somewhere, but hidden from direct access for simplicty, certainly more than enough for our purposes.

Let’s begin by doing the initialization. We’ll try to keep the code as simple as possible, even if that means certain repetition. The interested reader is welcome to improve the code! Here is the first part of the initialization:

let (mut width, mut height) = window::screen_size();

let mut from = Complex::new(-1.7, -1.3);
let mut to = Complex::new(1.0, 1.3);

let mut image = Image::gen_image_color(width as u16, height as u16, BLACK);
let mut bmp = Texture2D::from_image(&image);

We start by defining width and height that hold the current window size. The window struct is provided by macroquad. Part of its simplicity is that there is just one window, so the “methods” on window are associated functions (“static” functions for you C++/C#/Java people). screen_size, despite the name, returns the window size, which can be changed by the user by dragging in the usual way, so we may need to update these variables, which is why they are declared as mutable.

Next, we initialize from and to to give a good visual of the entire Mandelbrot set. The user will be able to zoom in by selecting a rectangle with the mouse, so there variable will change as well.

Now we need that array of pixels – the Image struct (from macroquad) manages such a buffer – we create it with the get_image_color helper that fills everything with black (BLACK is a const color provided by macroquad, and is imported by the use macroquad::prelude::*. Lastly, we need an actual texture that a GPU can draw, so we create one from the bits stored in the image. Both image and bmp are mutable, because of the possibility of window size changes, as we’ll see.

The second part of the initialization consists of activating the mandelbrot function to calculate the initial image, so we have something to show when we enter the loop:

mandelbrot(image.get_image_data_mut(), &from, &to, width as u32, height as u32);
bmp.update(&image);

We call mandelbrot with the current values of from, to, width and height. The only tricky part is getting a mutable reference to the internal array stored in the image object – this is the job of get_image_data_mut. It provides the exact [[u8;4]] required by mandelbrot. The texture’s update method takes in the updated pixels.

There a few more initializations we’ll need, we’ll these later. Now, we can enter the loop, and at the very least draw the current state of the texture:

loop {
    let params = DrawTextureParams {
        dest_size: Some(Vec2::new(width,height)),
        ..Default::default()
    };
    draw_texture_ex(&bmp, 0.0, 0.0, WHITE, params);

    next_frame().await
}

Normally, we could call draw_texture to draw the texture, and that would work well before the user resize the window. However, if the window is resized, the texture would either not fill the entire window or be cut off. To deal with that, we can use the extended version that requires a DrawTextureParams struct, that has some customization options, one of which is the destination size (dest_size) that we set to the current width and height. You may be wondering what is the strange syntax with that “default” stuff. In Rust, creating a struct instance (object) manually (that is, with no “constructor” associated function to help) requires initializing all members. This is what the structure looks like (press F12 in VSCode ot RustRover to navigate to the definition):

#[derive(Debug, Clone)]
pub struct DrawTextureParams {
    pub dest_size: Option<Vec2>,
    pub source: Option<Rect>,
    pub rotation: f32,
    pub flip_x: bool,
    pub flip_y: bool,
    pub pivot: Option<Vec2>,
}

I have removed the comments that describe each member so we can focus on the essentials. The idea is that we want to change dest_size but take all the other members with their defaults. But how do we know what these defaults are? We can guess from the documentation/comments, but it would be nicer if we could get all defaults except what we care about. This is exactly what ..Default::default() means. To be more precise, this compiles because DrawTextureParams implements the Default trait (interface):

impl Default for DrawTextureParams {
    fn default() -> DrawTextureParams {
        DrawTextureParams {
            dest_size: None,
            source: None,
            rotation: 0.,
            pivot: None,
            flip_x: false,
            flip_y: false,
        }
    }
}

This is pretty much standard Rust – structs can implement this trait to make it easy to work with members directly, but still be able to use default values.

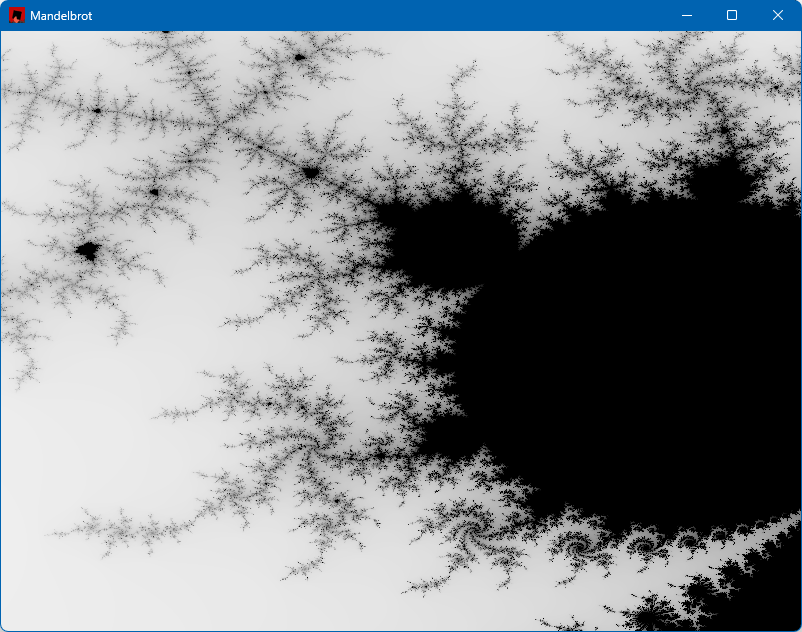
Back to draw_texture_ex: it accepts the texture to draw (on the window), the coordinates to start at (0,0), a tint color (white means no tint, try it with other values like RED or BLUE), and the last argument is our modified params. Running the application as is should show something like this:

Handling Input

So far, so good. The next step is to allow the user to drag a rectangular area to zoom into. For that we need to capture mouse input, and draw a thin rectangle. We can track whether the left mouse button is being held with a simple boolean (selecting), initialized to false in the initialization part.

For mouse input, we get convenient functions from macroquad. First, a mouse down check:

if !selecting && is_mouse_button_down(MouseButton::Left) {
     selecting = true;
     tl = Vec2::from(mouse_position());
}

If the left mouse button is down, we flip selecting and set the initial point (beginning of the drag operation) in a variable named tl (“top left”), which is of type Vec2 (provided by macroquad), which is a simple (x,y) holder. If the left mouse button is released, we need to zoom into that rectangle by calculating the new from and to and activating mandelbrot:

else if selecting && is_mouse_button_released(MouseButton::Left) {
    selecting = false;
    let br = Vec2::from(mouse_position());
    let size = to - from;
    from = Complex::new(
        from.re + tl.x as f64 * size.re / width as f64,
        from.im + tl.y as f64 * size.im / height as f64,
    );
    to = Complex::new(
        from.re + size.im * (br.x - tl.x) as f64 / width as f64,
        from.im + size.im * (br.y - tl.y) as f64 / height as f64,
    );
    mandelbrot(image.get_image_data_mut(), &from, &to, width as u32, height as u32);
    bmp.update(&image);
}

The required calculations are not complex (pun intended), middle-school level math. br (“bottom right”) keeps track of the current mouse position. Then we call mandelbrot and update the texture.

To show the selection rectangle while the user is dragging, we can draw it every frame in a natural way:

if selecting {
    let br = Vec2::from(mouse_position());
    draw_rectangle_lines(tl.x, tl.y, br.x - tl.x, br.y - tl.y, 2.0, RED);
}

The draw_rectangle_lines is used to draw a non-filled rectangle (draw_rectangle always fills it), which a thickness of 2.0 and a red color.

With this code in place, we can zoom in, here are a couple of examples:

Finishing Touches

We still don’t handle window resize. We can use a simple boolean to keep track of resize happening in a frame (size_changed). We can test in the loop if the size has changed:

let size = window::screen_size();
if size != (width as f32, height as f32) {
    // new window size
    size_changed = true;
}
(width, height) = window::screen_size();

width and height are updated with the current size regardless, so that the texture is drawn correctly. But we also want the image to match the window size. We do that inside the check for a left mouse release where we need to call mandelbrot again so we may as well update the texture appropriately:

if size_changed {
    image = Image::gen_image_color(width as u16, height as u16, BLACK);
    bmp = Texture2D::from_image(&image);
    size_changed = false;
}
mandelbrot(image.get_image_data_mut(), &from, &to, width as u32, height as u32);
bmp.update(&image);

The last two lines have not changed. The image is rebuilt if a new window size is selected.

Lastly, we need some way to reset the set to its original coordinates, if we want to zoom into other areas in the image. We could add a button, but for this example I just added a right-click that resets the values:

if is_mouse_button_pressed(MouseButton::Right) {
    from = Complex::new(-1.7, -1.3);
    to = Complex::new(1.0, 1.3);
    mandelbrot(image.get_image_data_mut(), &from, &to, width as u32, height as u32);
    bmp.update(&image);
}

What’s Next?

Are we done? Not really. Two things I’d like to add:

  • Make the Mandelbrot calculation faster. Right now it’s a single thread, we can do better.
  • Make the image colorful, not just grayscale.

We’ll deal with these items in future posts.

The full code can be found here:

Writing a Simple Driver in Rust

The Rust language ecosystem is growing each day, its popularity increasing, and with good reason. It’s the only mainstream language that provides memory and concurrency safety at compile time, with a powerful and rich build system (cargo), and a growing number of packages (crates).

My daily driver is still C++, as most of my work is about low-level system and kernel programming, where the Windows C and COM APIs are easy to consume. Rust is a system programming language, however, which means it plays, or at least can play, in the same playground as C/C++. The main snag is the verbosity required when converting C types to Rust. This “verbosity” can be alleviated with appropriate wrappers and macros. I decided to try writing a simple WDM driver that is not useless – it’s a Rust version of the “Booster” driver I demonstrate in my book (Windows Kernel Programming), that allows changing the priority of any thread to any value.

Getting Started

To prepare for building drivers, consult Windows Drivers-rs, but basically you should have a WDK installation (either normal or the EWDK). Also, the docs require installing LLVM, to gain access to the Clang compiler. I am going to assume you have these installed if you’d like to try the following yourself.

We can start by creating a new Rust library project (as a driver is a technically a DLL loaded into kernel space):

cargo new --lib booster

We can open the booster folder in VS Code, and begin are coding. First, there are some preparations to do in order for actual code to compile and link successfully. We need a build.rs file to tell cargo to link statically to the CRT. Add a build.rs file to the root booster folder, with the following code:

fn main() -> Result<(), wdk_build::ConfigError> {
    std::env::set_var("CARGO_CFG_TARGET_FEATURE", "crt-static");
    wdk_build::configure_wdk_binary_build()
}

(Syntax highlighting is imperfect because the WordPress editor I use does not support syntax highlighting for Rust)

Next, we need to edit cargo.toml and add all kinds of dependencies. The following is the minimum I could get away with:

[package]
name = "booster"
version = "0.1.0"
edition = "2021"

[package.metadata.wdk.driver-model]
driver-type = "WDM"

[lib]
crate-type = ["cdylib"]
test = false

[build-dependencies]
wdk-build = "0.3.0"

[dependencies]
wdk = "0.3.0"       
wdk-macros = "0.3.0"
wdk-alloc = "0.3.0" 
wdk-panic = "0.3.0" 
wdk-sys = "0.3.0"   

[features]
default = []
nightly = ["wdk/nightly", "wdk-sys/nightly"]

[profile.dev]
panic = "abort"
lto = true

[profile.release]
panic = "abort"
lto = true

The important parts are the WDK crates dependencies. It’s time to get to the actual code in lib.rs.

The Code

We start by removing the standard library, as it does not exist in the kernel:

#![no_std]

Next, we’ll add a few use statements to make the code less verbose:

use core::ffi::c_void;
use core::ptr::null_mut;
use alloc::vec::Vec;
use alloc::{slice, string::String};
use wdk::*;
use wdk_alloc::WdkAllocator;
use wdk_sys::ntddk::*;
use wdk_sys::*;

The wdk_sys crate provides the low level interop kernel functions. the wdk crate provides higher-level wrappers. alloc::vec::Vec is an interesting one. Since we can’t use the standard library, you would think the types like std::vec::Vec<> are not available, and technically that’s correct. However, Vec is actually defined in a lower level module named alloc::vec, that can be used outside the standard library. This works because the only requirement for Vec is to have a way to allocate and deallocate memory. Rust exposes this aspect through a global allocator object, that anyone can provide. Since we have no standard library, there is no global allocator, so one must be provided. Then, Vec (and String) can work normally:

#[global_allocator]
static GLOBAL_ALLOCATOR: WdkAllocator = WdkAllocator;

This is the global allocator provided by the WDK crates, that use ExAllocatePool2 and ExFreePool to manage allocations, just like would do manually.

Next, we add two extern crates to get the support for the allocator and a panic handler – another thing that must be provided since the standard library is not included. Cargo.toml has a setting to abort the driver (crash the system) if any code panics:

extern crate wdk_panic;
extern crate alloc;

Now it’s time to write the actual code. We start with DriverEntry, the entry point to any Windows kernel driver:

#[export_name = "DriverEntry"]
pub unsafe extern "system" fn driver_entry(
    driver: &mut DRIVER_OBJECT,
    registry_path: PUNICODE_STRING,
) -> NTSTATUS {

Those familiar with kernel drivers will recognize the function signature (kind of). The function name is driver_entry to conform to the snake_case Rust naming convention for functions, but since the linker looks for DriverEntry, we decorate the function with the export_name attribute. You could use DriverEntry and just ignore or disable the compiler’s warning, if you prefer.

We can use the familiar println! macro, that was reimplemented by calling DbgPrint, as you would if you were using C/C++. You can still call DbgPrint, mind you, but println! is just easier:

println!("DriverEntry from Rust! {:p}", &driver);
let registry_path = unicode_to_string(registry_path);
println!("Registry Path: {}", registry_path);

Unfortunately, it seems println! does not yet support a UNICODE_STRING, so we can write a function named unicode_to_string to convert a UNICODE_STRING to a normal Rust string:

fn unicode_to_string(str: PCUNICODE_STRING) -> String {
    String::from_utf16_lossy(unsafe {
        slice::from_raw_parts((*str).Buffer, (*str).Length as usize / 2)
    })
}

Back in DriverEntry, our next order of business is to create a device object with the name “\Device\Booster”:

let mut dev = null_mut();
let mut dev_name = UNICODE_STRING::default();
string_to_ustring("\\Device\\Booster", &mut dev_name);

let status = IoCreateDevice(
    driver,
    0,
    &mut dev_name,
    FILE_DEVICE_UNKNOWN,
    0,
    0u8,
    &mut dev,
);

The string_to_ustring function converts a Rust string to a UNICODE_STRING:

fn string_to_ustring(s: &str, uc: &mut UNICODE_STRING) -> Vec<u16> {
    let mut wstring: Vec<_> = s.encode_utf16().collect();
    uc.Length = wstring.len() as u16 * 2;
    uc.MaximumLength = wstring.len() as u16 * 2;
    uc.Buffer = wstring.as_mut_ptr();
    wstring
}

This may look more complex than we would like, but think of this as a function that is written once, and then just used all over the place. In fact, maybe there is such a function already, and just didn’t look hard enough. But it will do for this driver.

If device creation fails, we return a failure status:

if !nt_success(status) {
    println!("Error creating device 0x{:X}", status);
    return status;
}

nt_success is similar to the NT_SUCCESS macro provided by the WDK headers.

Next, we’ll create a symbolic link so that a standard CreateFile call could open a handle to our device:

let mut sym_name = UNICODE_STRING::default();
let _ = string_to_ustring("\\??\\Booster", &mut sym_name);
let status = IoCreateSymbolicLink(&mut sym_name, &mut dev_name);
if !nt_success(status) {
    println!("Error creating symbolic link 0x{:X}", status);
    IoDeleteDevice(dev);
    return status;
}

All that’s left to do is initialize the device object with support for Buffered I/O (we’ll use IRP_MJ_WRITE for simplicity), set the driver unload routine, and the major functions we intend to support:

    (*dev).Flags |= DO_BUFFERED_IO;

    driver.DriverUnload = Some(boost_unload);
    driver.MajorFunction[IRP_MJ_CREATE as usize] = Some(boost_create_close);
    driver.MajorFunction[IRP_MJ_CLOSE as usize] = Some(boost_create_close);
    driver.MajorFunction[IRP_MJ_WRITE as usize] = Some(boost_write);

    STATUS_SUCCESS
}

Note the use of the Rust Option<> type to indicate the presence of a callback.

The unload routine looks like this:

unsafe extern "C" fn boost_unload(driver: *mut DRIVER_OBJECT) {
    let mut sym_name = UNICODE_STRING::default();
    string_to_ustring("\\??\\Booster", &mut sym_name);
    let _ = IoDeleteSymbolicLink(&mut sym_name);
    IoDeleteDevice((*driver).DeviceObject);
}

We just call IoDeleteSymbolicLink and IoDeleteDevice, just like a normal kernel driver would.

Handling Requests

We have three request types to handle – IRP_MJ_CREATE, IRP_MJ_CLOSE, and IRP_MJ_WRITE. Create and close are trivial – just complete the IRP successfully:

unsafe extern "C" fn boost_create_close(_device: *mut DEVICE_OBJECT, irp: *mut IRP) -> NTSTATUS {
    (*irp).IoStatus.__bindgen_anon_1.Status = STATUS_SUCCESS;
    (*irp).IoStatus.Information = 0;
    IofCompleteRequest(irp, 0);
    STATUS_SUCCESS
}

The IoStatus is an IO_STATUS_BLOCK but it’s defined with a union containing Status and Pointer. This seems to be incorrect, as Information should be in a union with Pointer (not Status). Anyway, the code accesses the Status member through the “auto generated” union, and it looks ugly. Definitely something to look into further. But it works.

The real interesting function is the IRP_MJ_WRITE handler, that does the actual thread priority change. First, we’ll declare a structure to represent the request to the driver:

#[repr(C)]
struct ThreadData {
    pub thread_id: u32,
    pub priority: i32,
}

The use of repr(C) is important, to make sure the fields are laid out in memory just as they would with C/C++. This allows non-Rust clients to talk to the driver. In fact, I’ll test the driver with a C++ client I have that used the C++ version of the driver. The driver accepts the thread ID to change and the priority to use. Now we can start with boost_write:

unsafe extern "C" fn boost_write(_device: *mut DEVICE_OBJECT, irp: *mut IRP) -> NTSTATUS {
    let data = (*irp).AssociatedIrp.SystemBuffer as *const ThreadData;

First, we grab the data pointer from the SystemBuffer in the IRP, as we asked for Buffered I/O support. This is a kernel copy of the client’s buffer. Next, we’ll do some checks for errors:

let status;
loop {
    if data == null_mut() {
        status = STATUS_INVALID_PARAMETER;
        break;
    }
    if (*data).priority < 1 || (*data).priority > 31 {
        status = STATUS_INVALID_PARAMETER;
        break;
    }

The loop statement creates an infinite block that can be exited with a break. Once we verified the priority is in range, it’s time to locate the thread object:

let mut thread = null_mut();
status = PsLookupThreadByThreadId(((*data).thread_id) as *mut c_void, &mut thread);
if !nt_success(status) {
    break;
}

PsLookupThreadByThreadId is the one to use. If it fails, it means the thread ID probably does not exist, and we break. All that’s left to do is set the priority and complete the request with whatever status we have:

        KeSetPriorityThread(thread, (*data).priority);
        ObfDereferenceObject(thread as *mut c_void);
        break;
    }
    (*irp).IoStatus.__bindgen_anon_1.Status = status;
    (*irp).IoStatus.Information = 0;
    IofCompleteRequest(irp, 0);
    status
}

That’s it!

The only remaining thing is to sign the driver. It seems that the crates support signing the driver if an INF or INX files are present, but this driver is not using an INF. So we need to sign it manually before deployment. The following can be used from the root folder of the project:

signtool sign /n wdk /fd sha256 target\debug\booster.dll

The /n wdk uses a WDK test certificate typically created automatically by Visual Studio when building drivers. I just grab the first one in the store that starts with “wdk” and use it.

The silly part is the file extension – it’s a DLL and there currently is no way to change it automatically as part of cargo build. If using an INF/INX, the file extension does change to SYS. In any case, file extensions don’t really mean that much – we can rename it manually, or just leave it as DLL.

Installing the Driver

The resulting file can be installed in the “normal” way for a software driver, such as using the sc.exe tool (from an elevated command window), on a machine with test signing on. Then sc start can be used to load the driver into the system:

sc.exe sc create booster type= kernel binPath= c:\path_to_driver_file
sc.exe start booster

Testing the Driver

I used an existing C++ application that talks to the driver and expects to pass the correct structure. It looks like this:

#include <Windows.h>
#include <stdio.h>

struct ThreadData {
	int ThreadId;
	int Priority;
};

int main(int argc, const char* argv[]) {
	if (argc < 3) {
		printf("Usage: boost <tid> <priority>\n");
		return 0;
	}

	int tid = atoi(argv[1]);
	int priority = atoi(argv[2]);

	HANDLE hDevice = CreateFile(L"\\\\.\\Booster",
		GENERIC_WRITE, 0, nullptr, OPEN_EXISTING, 0,
		nullptr);

	if (hDevice == INVALID_HANDLE_VALUE) {
		printf("Failed in CreateFile: %u\n", GetLastError());
		return 1;
	}

	ThreadData data;
	data.ThreadId = tid;
	data.Priority = priority;
	DWORD ret;
	if (WriteFile(hDevice, &data, sizeof(data),
		&ret, nullptr))
		printf("Success!!\n");
	else
		printf("Error (%u)\n", GetLastError());

	CloseHandle(hDevice);

	return 0;
}

Here is the result when changing a thread’s priority to 26 (ID 9408):

Conclusion

Writing kernel drivers in Rust is possible, and I’m sure the support for this will improve quickly. The WDK crates are at version 0.3, which means there is still a way to go. To get the most out of Rust in this space, safe wrappers should be created so that the code is less verbose, does not have unsafe blocks, and enjoys the benefits Rust can provide. Note, that I may have missed some wrappers in this simple implementation.

You can find a couple of more samples for KMDF Rust drivers here.

The code for this post can be found at https://github.com/zodiacon/Booster.

Learn more about Rust at https://trainsec.net.

ObjDir – Rust Version

In the previous post, I’ve shown how to write a minimal, but functional, Projected File System provider using C++. I also semi-promised to write a version of that provider in Rust. I thought we should start small, by implementing a command line tool I wrote years ago called objdir. Its purpose is to be a “command line” version of a simplified WinObj from Sysinternals. It should be able to list objects (name and type) within a given object manager namespace directory. Here are a couple of examples:

D:\>objdir \
PendingRenameMutex (Mutant)
ObjectTypes (Directory)
storqosfltport (FilterConnectionPort)
MicrosoftMalwareProtectionRemoteIoPortWD (FilterConnectionPort)
Container_Microsoft.OutlookForWindows_1.2024.214.400_x64__8wekyb3d8bbwe-S-1-5-21-3968166439-3083973779-398838822-1001 (Job)
MicrosoftDataLossPreventionPort (FilterConnectionPort)
SystemRoot (SymbolicLink)
exFAT (Device)
Sessions (Directory)
MicrosoftMalwareProtectionVeryLowIoPortWD (FilterConnectionPort)
ArcName (Directory)
PrjFltPort (FilterConnectionPort)
WcifsPort (FilterConnectionPort)
...

D:\>objdir \kernelobjects
MemoryErrors (SymbolicLink)
LowNonPagedPoolCondition (Event)
Session1 (Session)
SuperfetchScenarioNotify (Event)
SuperfetchParametersChanged (Event)
PhysicalMemoryChange (SymbolicLink)
HighCommitCondition (SymbolicLink)
BcdSyncMutant (Mutant)
HighMemoryCondition (SymbolicLink)
HighNonPagedPoolCondition (Event)
MemoryPartition0 (Partition)
...

Since enumerating object manager directories is required for our ProjFS provider, once we implement objdir in Rust, we’ll have good starting point for implementing the full provider in Rust.

This post assumes you are familiar with the fundamentals of Rust. Even if you’re not, the code should still be fairly understandable, as we’re mostly going to use unsafe rust to do the real work.

Unsafe Rust

One of the main selling points of Rust is its safety – memory and concurrency safety guaranteed at compile time. However, there are cases where access is needed that cannot be checked by the Rust compiler, such as the need to call external C functions, such as OS APIs. Rust allows this by using unsafe blocks or functions. Within unsafe blocks, certain operations are allowed which are normally forbidden; it’s up to the developer to make sure the invariants assumed by Rust are not violated – essentially making sure nothing leaks, or otherwise misused.

The Rust standard library provides some support for calling C functions, mostly in the std::ffi module (FFI=Foreign Function Interface). This is pretty bare bones, providing a C-string class, for example. That’s not rich enough, unfortunately. First, strings in Windows are mostly UTF-16, which is not the same as a classic C string, and not the same as the Rust standard String type. More importantly, any C function that needs to be invoked must be properly exposed as an extern "C" function, using the correct Rust types that provide the same binary representation as the C types.

Doing all this manually is a lot of error-prone, non-trivial, work. It only makes sense for simple and limited sets of functions. In our case, we need to use native APIs, like NtOpenDirectoryObject and NtQueryDirectoryObject. To simplify matters, there are crates available in crates.io (the master Rust crates repository) that already provide such declarations.

Adding Dependencies

Assuming you have Rust installed, open a command window and create a new project named objdir:

cargo new objdir

This will create a subdirectory named objdir, hosting the binary crate created. Now we can open cargo.toml (the manifest) and add dependencies for the following crates:

[dependencies]
ntapi = "0.4"
winapi = { version = "0.3.9", features = [ "impl-default" ] }

winapi provides most of the Windows API declarations, but does not provide native APIs. ntapi provides those additional declarations, and in fact depends on winapi for some fundamental types (which we’ll need). The feature “impl-default” indicates we would like the implementations of the standard Rust Default trait provided – we’ll need that later.

The main Function

The main function is going to accept a command line argument to indicate the directory to enumerate. If no parameters are provided, we’ll assume the root directory is requested. Here is one way to get that directory:

let dir = std::env::args().skip(1).next().unwrap_or("\\".to_owned());

(Note that unfortunately the WordPress system I’m using to write this post has no syntax highlighting for Rust, the code might be uglier than expected; I’ve set it to C++).

The args method returns an iterator. We skip the first item (the executable itself), and grab the next one with next. It returns an Option<String>, so we grab the string if there is one, or use a fixed backslash as the string.

Next, we’ll call a helper function, enum_directory that does the heavy lifting and get back a Result where success is a vector of tuples, each containing the object’s name and type (Vec<(String, String)>). Based on the result, we can display the results or report an error:

let result = enum_directory(&dir);
match result {
    Ok(objects) => {
        for (name, typename) in &objects {
            println!("{name} ({typename})");
        }
        println!("{} objects.", objects.len());
    },
    Err(status) => println!("Error: 0x{status:X}")
};

That is it for the main function.

Enumerating Objects

Since we need to use APIs defined within the winapi and ntapi crates, let’s bring them into scope for easier access at the top of the file:

use winapi::shared::ntdef::*;
use ntapi::ntobapi::*;
use ntapi::ntrtl::*;

I’m using the “glob” operator (*) to make it easy to just use the function names directly without any prefix. Why these specific modules? Based on the APIs and types we’re going to need, these are where these are defined (check the documentation for these crates).

enum_directory is where the real is done. Here its declararion:

fn enum_directory(dir: &str) -> Result<Vec<(String, String)>, NTSTATUS> {

The function accepts a string slice and returns a Result type, where the Ok variant is a vector of tuples consisting of two standard Rust strings.

The following code follows the basic logic of the EnumDirectoryObjects function from the ProjFS example in the previous post, without the capability of search or filter. We’ll add that when we work on the actual ProjFS project in a future post.

The first thing to do is open the given directory object with NtOpenDirectoryObject. For that we need to prepare an OBJECT_ATTRIBUTES and a UNICODE_STRING. Here is what that looks like:

let mut items = vec![];

unsafe {
    let mut udir = UNICODE_STRING::default();
    let wdir = string_to_wstring(&dir);
    RtlInitUnicodeString(&mut udir, wdir.as_ptr());
    let mut dir_attr = OBJECT_ATTRIBUTES::default();
    InitializeObjectAttributes(&mut dir_attr, &mut udir, OBJ_CASE_INSENSITIVE, NULL, NULL);

We start by creating an empty vector to hold the results. We don’t need any type annotation because later in the code the compiler would have enough information to deduce it on its own. We then start an unsafe block because we’re calling C APIs.

Next, we create a default-initialized UNICODE_STRING and use a helper function to convert a Rust string slice to a UTF-16 string, usable by native APIs. We’ll see this string_to_wstring helper function once we’re done with this one. The returned value is in fact a Vec<u16> – an array of UTF-16 characters.

The next step is to call RtlInitUnicodeString, to initialize the UNICODE_STRING based on the UTF-16 string we just received. Methods such as as_ptr are necessary to make the Rust compiler happy. Finally, we create a default OBJECT_ATTRIBUTES and initialize it with the udir (the UTF-16 directory string). All the types and constants used are provided by the crates we’re using.

The next step is to actually open the directory, which could fail because of insufficient access or a directory that does not exist. In that case, we just return an error. Otherwise, we move to the next step:

let mut hdir: HANDLE = NULL;
match NtOpenDirectoryObject(&mut hdir, DIRECTORY_QUERY, &mut dir_attr) {
    0 => {
        // do real work...
    },
    err => Err(err),
}

The NULL here is just a type alias for the Rust provided C void pointer with a value of zero (*mut c_void). We examine the NTSTATUS returned using a match expression: If it’s not zero (STATUS_SUCCESS), it must be an error and we return an Err object with the status. if it’s zero, we’re good to go. Now comes the real work.

We need to allocate a buffer to receive the object information in this directory and be prepared for the case the information is too big for the allocated buffer, so we may need to loop around to get the next “chunk” of data. This is how the NtQueryDirectoryObject is expected to be used. Let’s allocate a buffer using the standard Vec<> type and prepare some locals:

const LEN: u32 = 1 << 16;
let mut first = 1;
let mut buffer: Vec<u8> = Vec::with_capacity(LEN as usize);
let mut index = 0u32;
let mut size: u32 = 0;

We’re allocating 64KB, but could have chosen any number. Now the loop:

loop {
    let start = index;
    if NtQueryDirectoryObject(hdir, buffer.as_mut_ptr().cast(), LEN, 0, first, &mut index, &mut size) < 0 {
        break;
    }
    first = 0;
    let mut obuffer = buffer.as_ptr() as *const OBJECT_DIRECTORY_INFORMATION;
    for _ in 0..index - start {
        let item = *obuffer;
        let name = String::from_utf16_lossy(std::slice::from_raw_parts(item.Name.Buffer, (item.Name.Length / 2) as usize));
        let typename = String::from_utf16_lossy(std::slice::from_raw_parts(item.TypeName.Buffer, (item.TypeName.Length / 2) as usize));
        items.push((name, typename));
        obuffer = obuffer.add(1);
    }
}
Ok(items)

There are quite a few things going on here. if NtQueryDirectoryObject fails, we break out of the loop. This happens when there are is no more information to give. If there is data, buffer is cast to a OBJECT_DIRECTORY_INFORMATION pointer, and we can loop around on the items that were returned. start is used to keep track of the previous number of items delivered. first is 1 (true) the first time through the loop to force the NtQueryDirectoryObject to start from the beginning.

Once we have an item (item), its two members are extracted. item is of type OBJECT_DIRECTORY_INFORMATION and has two members: Name and TypeName (both UNICODE_STRING). Since we want to return standard Rust strings (which, by the way, are UTF-8 encoded), we must convert the UNICODE_STRINGs to Rust strings. String::from_utf16_lossy performs such a conversion, but we must specify the number of characters, because a UNICODE_STRING does not have to be NULL-terminated. The trick here is std::slice::from_raw_parts that can have a length, which is half of the number of bytes (Length member in UNICODE_STRING).

Finally, Vec<>.push is called to add the tuple (name, typename) to the vector. This is what allows the compiler to infer the vector type. Once we exit the loop, the Ok variant of Result<> is returned with the vector.

The last function used is the helper to convert a Rust string slice to a UTF-16 null-terminated string:

fn string_to_wstring(s: &str) -> Vec<u16> {
    let mut wstring: Vec<_> = s.encode_utf16().collect();
    wstring.push(0);    // null terminator
    wstring
}

And that is it. The Rust version of objdir is functional.

The full source is at zodiacon/objdir-rs: Rust version of the objdir tool (github.com)

If you want to know more about Rust, consider signing up for my upcoming Rust masterclass programming.